How to Remove Invisalign With Many Attachments: Easy Steps
Last Updated on 3 months by DR. ALBIN SIPES
To remove Invisalign with many attachments, gently wiggle the aligners to loosen them. Use a dental tool or your fingers to carefully lift them off.
Removing Invisalign can seem daunting, especially with multiple attachments. These small, tooth-colored bumps help aligners grip your teeth better. While they may feel secure, the removal process is straightforward. Proper technique ensures you don’t damage your teeth or the attachments.
Always start from the back teeth and work your way forward. This method helps minimize discomfort and protects your dental work. Using a gentle touch is key. Mastering this process can make your orthodontic journey smoother and more comfortable. Let’s explore the step-by-step approach to safely remove your aligners without stress.

Credit: youbraces.com
Introduction To Invisalign And Attachments
Invisalign has become a very popular choice for teeth straightening. Many people prefer it over traditional braces. This is mainly due to its clear aligners that are less noticeable.
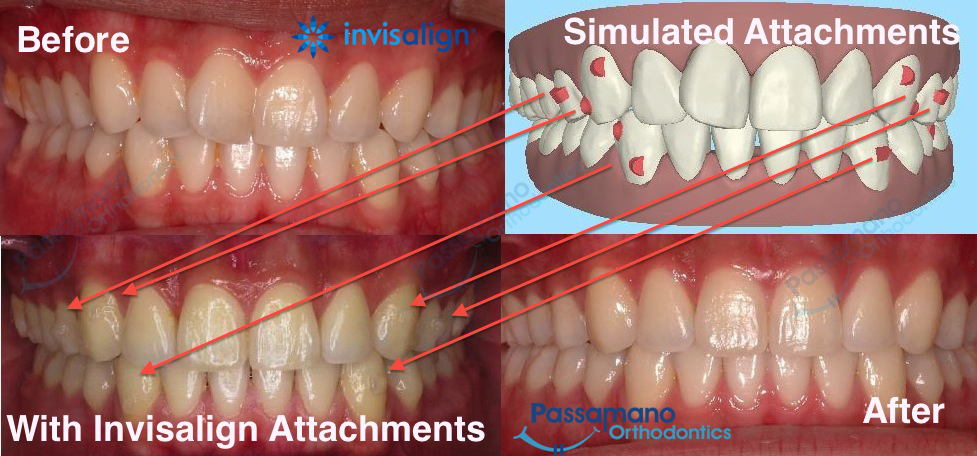
Attachments are small, tooth-colored bumps placed on teeth. They help aligners grip the teeth better. This makes the treatment more effective. Without attachments, some movements may not happen as planned.
These attachments come in different shapes and sizes. They are customized for each patient’s treatment plan. Their purpose is to create the right amount of force to move teeth.

Credit: myinvisalignblog.com
Preparation For Removal
Before removing your Invisalign, make sure your hands are clean. Wash them thoroughly with soap and water. This step helps to prevent bacteria from entering your mouth.
Position yourself in front of a mirror. This allows you to see the attachments clearly. A good view helps to ensure you remove them safely and effectively.
Use a gentle touch when handling your aligners. This will help avoid any damage to your teeth or attachments. Take your time and be patient throughout the process.
The Removal Process
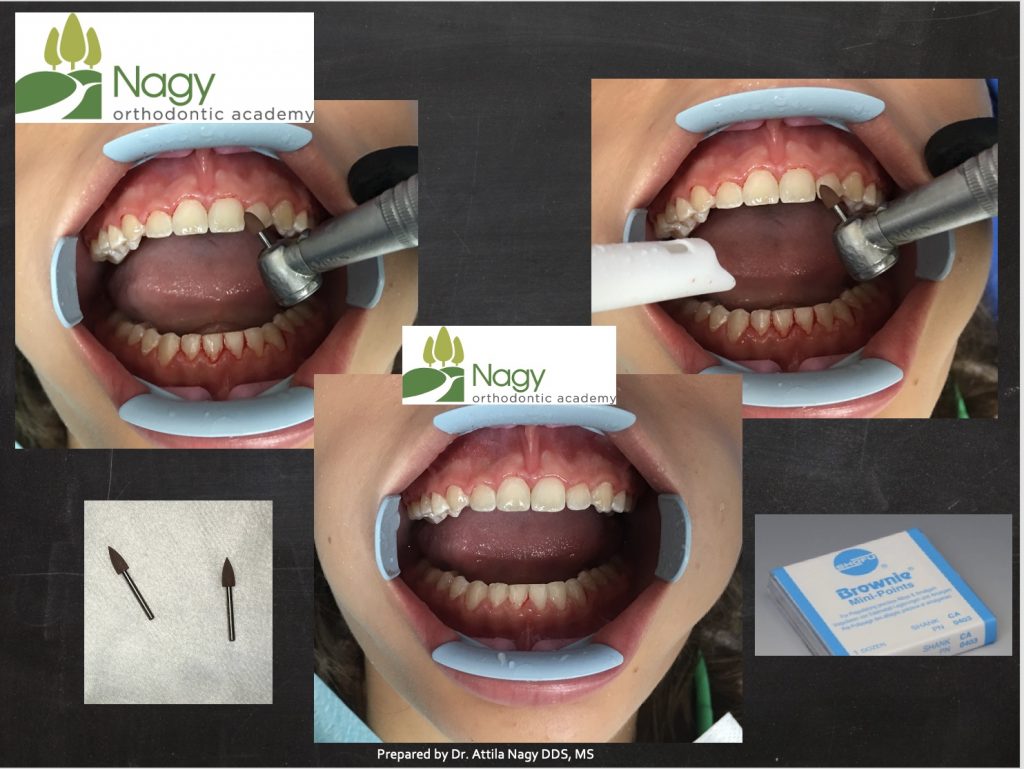
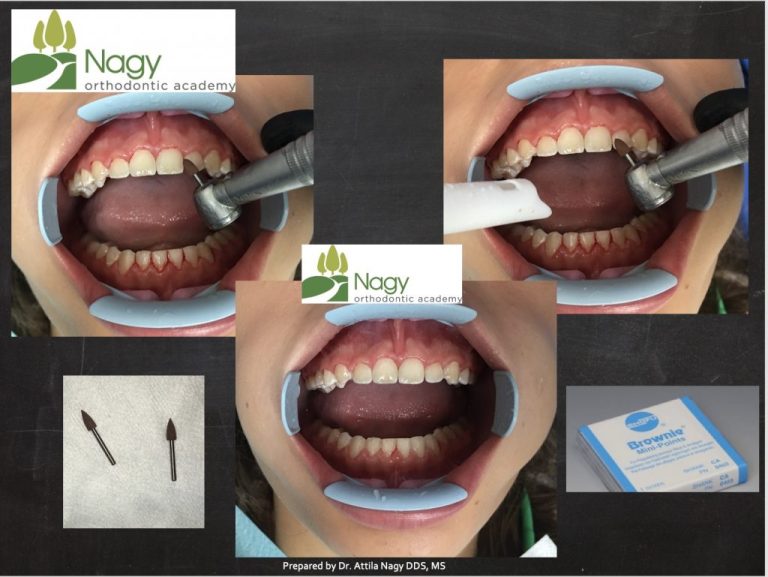
To remove Invisalign with many attachments, start from the back. This makes the process easier and safer. Use specialized removal tools designed for this task. These tools help to avoid damage to your teeth or attachments.
Carefully insert the removal tool under the first attachment. Gently wiggle it to loosen the attachment. Once loose, pull it off slowly. Repeat this for each attachment, moving towards the front.
Make sure to check for any remaining pieces after each removal. Use a mirror to see everything clearly. Keeping your teeth clean after removal is also very important.
Troubleshooting Common Issues
Invisalign aligners can sometimes become stuck due to attachments. To remove them, gently wiggle the aligner from the back. Use your fingers to apply even pressure. Avoid using sharp objects as they can cause damage. If the aligner is still stuck, try soaking it in warm water for a few minutes. This can help loosen it.
Seek professional help if aligners remain stuck after these attempts. An orthodontist can safely remove them without causing harm. Regular visits ensure that your treatment stays on track. Address any discomfort or concerns during these appointments.
Care And Maintenance Of Invisalign
Cleaning aligners after removal is very important. Rinse them under lukewarm water to remove debris. Use a soft toothbrush to gently scrub the surfaces. Avoid using toothpaste, as it can be too abrasive. Clean aligners daily for the best results.
Storing aligners properly protects them from damage. Always keep them in a dry case when not in use. Avoid leaving them in places like cars or on tables. High temperatures can warp the aligners. Make sure the case is clean before placing the aligners inside.

Credit: nagyorthodonticacademy.com
Reinserting Your Aligners
Cleaning your aligners is very important. Use a soft toothbrush and mild soap. Avoid using hot water, as it can warp the aligners. Rinse them well after cleaning.
To reinsert your aligners, make sure they are dry. Align them with your teeth carefully. Press down gently to secure them in place. Ensure all attachments fit snugly.
Check for any discomfort after reinsertion. If they feel loose, adjust them again. Always follow your orthodontist’s instructions for the best results.
Tips For Easier Removal
Removing Invisalign with many attachments can be tricky. Practice is the key to mastering this skill. Regularly take out your aligners to build confidence. This helps you get used to the process.
Using Invisalign removal aids can make things easier. These tools provide extra grip for better control. They can also help reduce discomfort during removal. Consider trying the following aids:
- Dental Wax: Place it on attachments for smoother removal.
- Removal Tool: A special tool can help pull the aligner off.
- Fingertips: Use clean fingers to gently wiggle the aligners free.
With practice and the right tools, removal becomes a breeze. Stick with it, and you’ll find it easier each time.
What Not To Do
Removing Invisalign with many attachments can be tricky. Avoid pulling too hard. This can cause damage to your teeth and aligners. Use a gentle rocking motion instead. Never use sharp tools to pry them off. This can scratch your teeth.
Don’t rush the process. Take your time to avoid accidents. Always check the attachments before removal. If they feel loose, consult your orthodontist first. Keeping your aligners clean is essential. Regular cleaning prevents bacteria buildup.
Stay away from excessive force. This can lead to broken attachments. Be cautious and listen to your body. If you feel pain, stop immediately. Patience is vital for a successful removal.
Conclusion
Removing Invisalign with multiple attachments can be challenging, but it’s manageable with the right techniques. Always follow your orthodontist’s guidance for the best results. Patience is key during this process. Proper care will ensure your aligners and attachments last longer.
Stay committed to your smile journey for a successful outcome.


